Making and Documenting Payments
To keep track of reimbursements, parents are able to track payments on their Expenses or make payments through the website using their OFWpay™ accounts.
In this tutorial:
Making and Documenting New Payments

You have the option to make payments via OFWpay™ or document payments you are sending your co-parent through means outside of OurFamilyWizard. Learn how to do either with this tutorial.
-
You have the option to make payments via OFWpay™ or document payments you are sending your co-parent through means outside of OurFamilyWizard. Learn how to do either with this tutorial.
-
Navigate to Expenses.
-
Click the Make Payment icon towards the top of the screen.
-
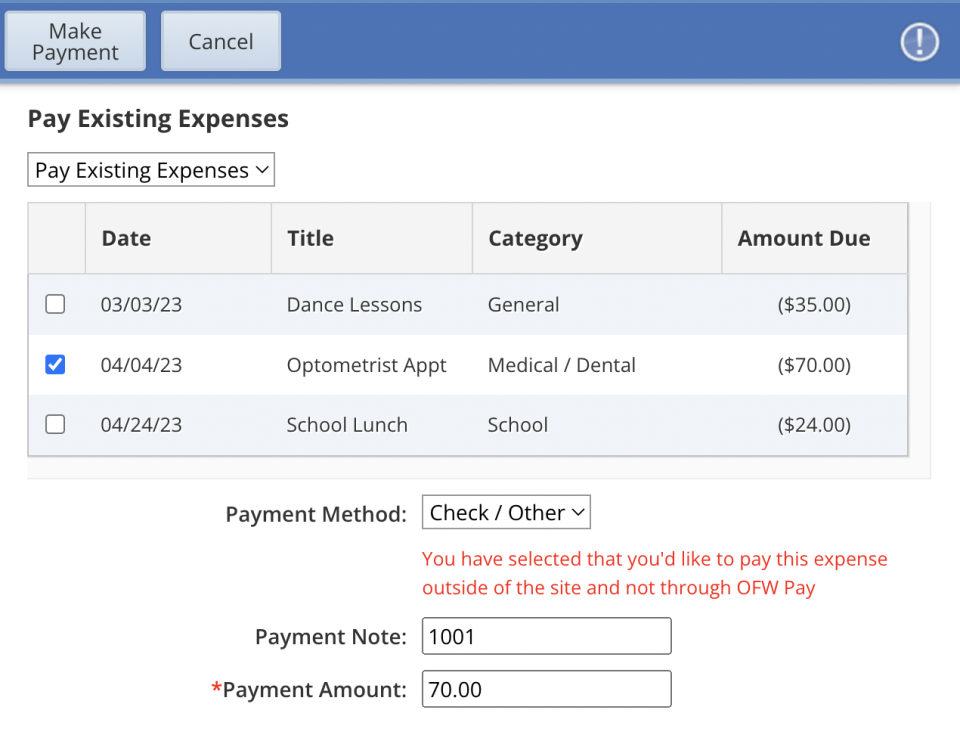
Select to pay a single expense or multiple expenses.
-
Single Expense: If you select to make a payment on a single expense, you have the option of paying in full or updating the payment amount to reflect a partial payment.
-
Multiple Expenses: When multiple expenses are selected for a payment, the total amount for each expense must be paid.
-
-
Select your payment method:
-
Check/Other: Outside of OurFamilyWizard payments will give you the option of a payment note (cash, check number, money order number, etc.) and payment amount.
-
OFWpay™: Use OFWpay to send the funds to your co-parent via a documented, electronic payment. If you do not see OFWpay as an option, either you, your co-parent, or both do not have an active OFWpay™ account. Click here for instructions on signing up for an OFWpay account.
-
- Click Make Payment in the top left corner.
Confirming a Payment from Your Co-Parent

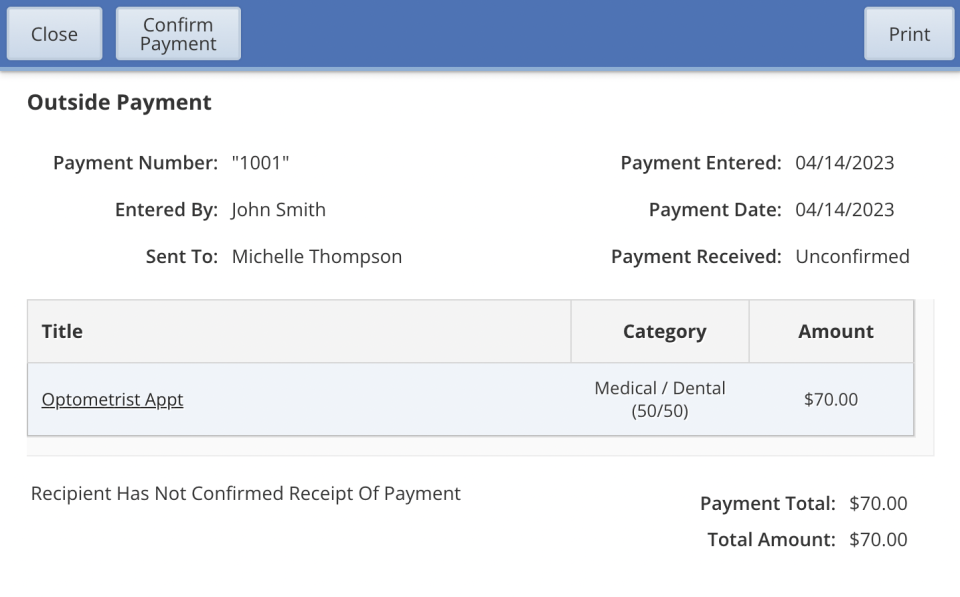
When a co-parent documents a payment they have made or intend to make outside of the website, the status of the expense will update to Approved (Payment Unconfirmed). The status will not update to Paid until the recipient confirms receipt of the payment. Follow these steps to confirm a payment from your co-parent.
Note: Only confirm Check/Other payments that you have already received. OFWpay™ payments do not need to be confirmed, so you will not see this option if payment is submitted via OFWpay™.
-
Go to Expenses.
-
You can navigate to the payment details in one of two ways:
-
Click the title of the expense in question. Then, click on the View Receipt link under Expense History.
-
Click the Payment Activity section in the lefthand menu. Then, click anywhere on the payment in question.
-
-
In the payment detail window, review the expenses included in the payment and confirm the total matches what you received.
-
Click Confirm Payment. Any expenses included in the payment will be updated.
Marking Expenses as Reimbursed

Co-parents who are receiving a payment through means outside of the website do not have to wait for their co-parent to log a payment to mark an expense as reimbursed. Follow these steps to mark a payment as reimbursed.
Note: Only expenses for which you have received reimbursement should be marked as reimbursed.
-
Navigate to Expenses.
-
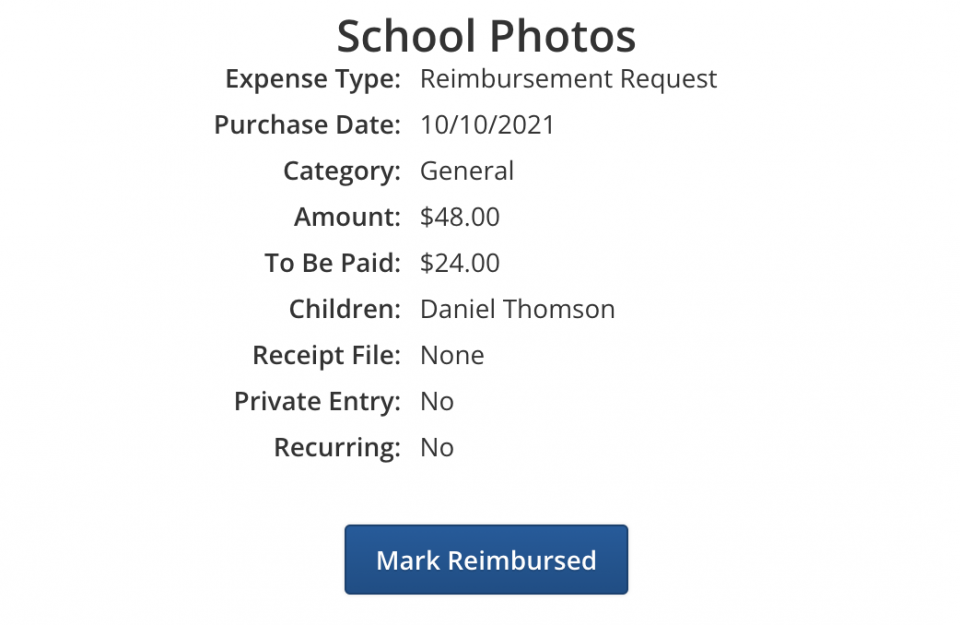
On your Expense Log, locate the expense in question.
-
Click anywhere on the expense to open it.
-
In the expense detail window that pops up, click Mark Reimbursed.
-
The status of the expense will update to Paid.
Once an expense has been marked as reimbursed, it cannot be updated or removed from the Expense Log.
Scheduling a Single or Recurring Payment with OFWpay™

With an OFWpay™ account, parents can schedule a one-time or recurring payment. Learn how with this tutorial.
Note: You must have an active OFWpay™ account to schedule payments.
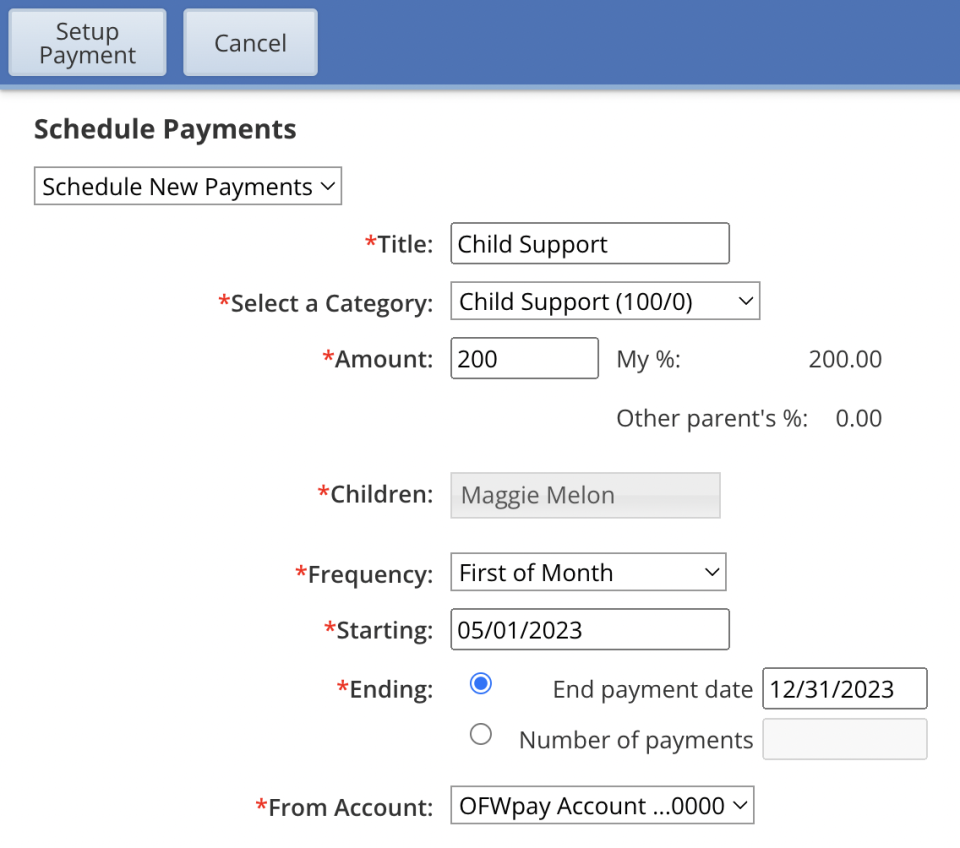
- Navigate to Scheduled Payments.
- Click the Create Scheduled Payment icon.
- Complete the required fields to give details about the expense. Select your frequency of payment, and indicate your starting date. To end your payment, choose either an end payment date or the number of payments to be made until paid in full.
- Select the account to make your scheduled payment from.
- Click Setup Payment.