Expense Log
Managing your shared parenting expenses is made easier with the OurFamilyWizard Expense Log. In this tutorial, learn how to create new expenses, update existing expenses, and respond to reimbursement requests from your co-parent.
In this tutorial:
Understanding the Expense Log
The Expense Log is where you’ll go to start managing expenses on OurFamilyWizard. Here’s a quick overview of what you’ll find in this section.

Totals
The totals give you a quick look at the amount each parent owes for all outstanding expenses. Once an expense is paid, it is deducted from the total amount the parent owes. Refused expenses are not calculated in the total.
Expense Log Columns
The Expense Log is divided into five columns: Created, Expense Name, Details, Status, and Owes/Paid. This keeps all of your expenses organized and easy to read as new ones are added and payments are made for reimbursement. Here is a quick breakdown of each column:

Created: This columns displays the date the expense was initially created. The Expense Log is organized chronologically by the creation date from newest to oldest. Note: this column can also be sorted to go from oldest to newest by clicking on the arrows next to Created.
Expense Name: This column displays the name of the expense and also includes the initials of the child the expense was for and the actual purchase date of the expense.
Details: Here is the total amount of the expense along with the category assigned to it for how the expense is split between the two parents.
Status: The status of the expense reflects the most recent action taken on it. To learn about the different expense statuses, visit this help page.
Owes/Paid: This column shows which parent was asked to reimburse an expense, how much they may owe or how much they have paid.

Create, Pay, and Download Expenses
At the top of the Expense Log are three icons which you can use to take the following actions:
Create Expense: Click the + symbol to create a new expense. You can also click the Create Expense button to the left of your screen to do the same.
Make Payment: Use this option if you’re ready to make a payment towards one or more expenses.
- Use the checkboxes to the left of each expense in the table below to select one or more expenses you wish to pay now.
- Click the icon that looks like a dollar with an arrow pointing up just above.
- Follow the prompts in the Pay Existing Expenses pop-up window. For more on how to make payments, check out this help page.
Download: Use this option to download one or multiple expense entries. Your download will include complete details about each individual expense, including status, entry history, and more.
- Use the checkboxes to the left of each expense in the table below to select one or more expenses you wish to download in one file.
- Click the icon that looks like an arrow pointing down.
- Click Print to download a PDF of the expense(s) you selected.

Creating a New Expense
Before creating a new expense in Expenses, you must first make sure that you have at least one child listed on your account. You can view the status of child accounts linked to your family in User Management within the My Account section.
- Navigate to the Expenses.
- Click the Create Expense icon at the top of the Expense Log.
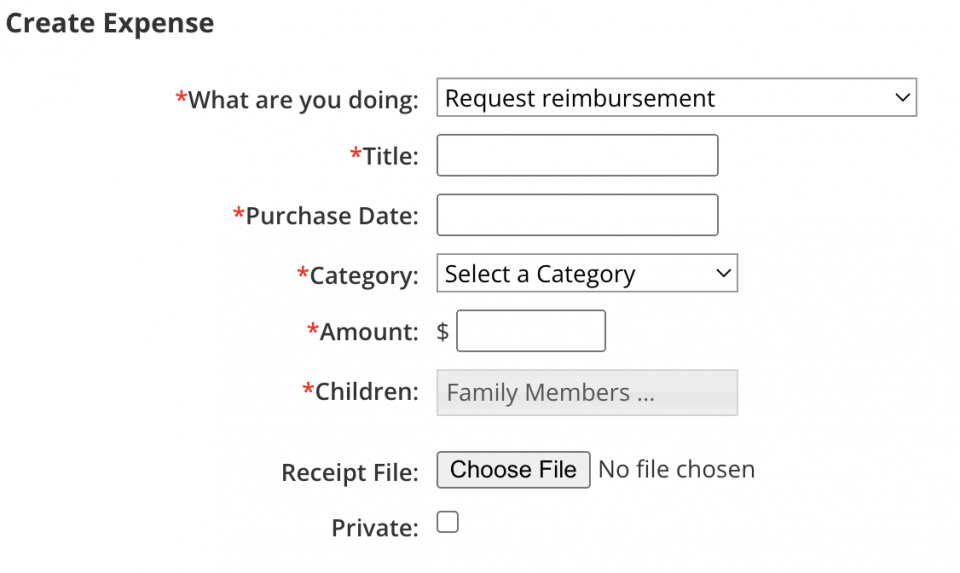
- Complete all required fields:
- What are you doing: Select whether you would like to request reimbursement or if this is an expense you need to pay.
- Title: Label the expense.
- Purchase Date: Indicate the date the expense was incurred. This date can be in the past or future.
- Category: Assign the expense to a category that accurately reflects how the expense is to be split between you and your co-parent. Don't see a category that reflects the percentages you need? Click here to learn how to create a new expense category.
- Amount: Enter the total for the expense. The category you choose will tell the system how this total should be split.
- Children: Indicate for which child(ren) the expense was incurred. If you do not see any options available in this field, you need to either create or reactivate a child's account. Click here for instructions.
- Complete any desired optional fields:
- Receipt File: You can upload a single receipt file to each expense.
- Private: If you wish to keep this expense entry private, check this box. When marked as private, only you will be able to see the expense entry details. Private expenses will be marked with a red "P" in the expense register.
- Click Save to save your entry to the expense register.

Editing or Deleting an Expense
Note: You can only edit or delete expenses that you have created. Additionally, only expenses that have not been responded to by your co-parent can be edited or deleted.
-
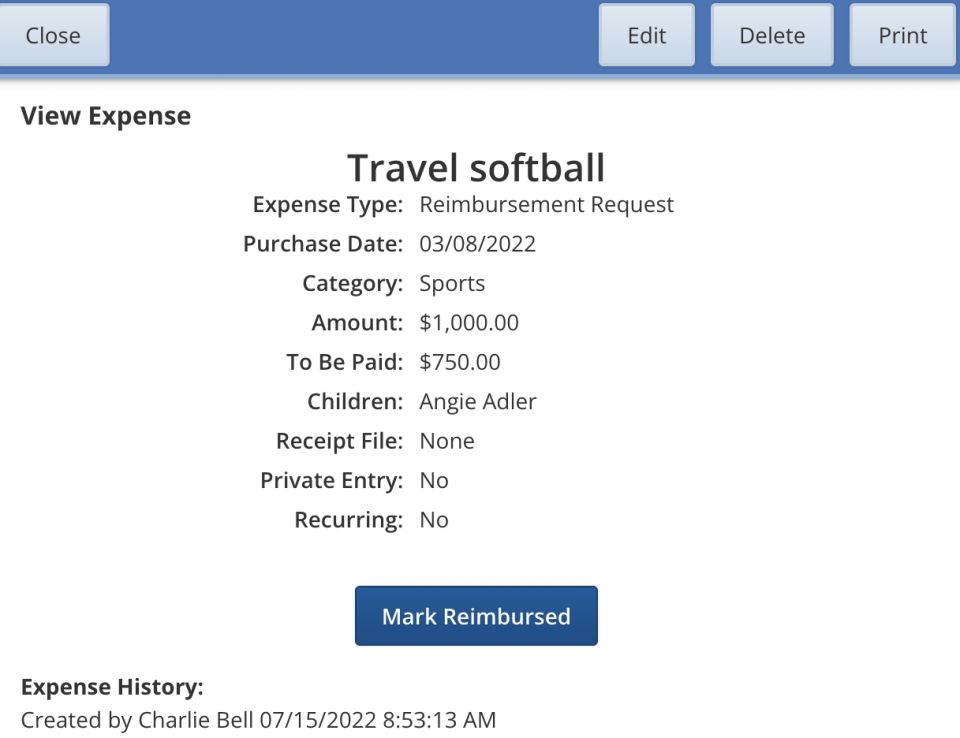
On your Expense Log, click anywhere on the expense you wish to edit or delete.
-
A window will open with the details of the expense, with the options to edit or delete the expense in the upper right corner.
-
Click Edit to make updates to this expense.
-
Click Delete to remove the expense from the Expense Log.
-
-
If you are editing an expense, you will be able to update the expense's details in the Edit Expense window. However, if a receipt file was previously uploaded to the expense, you are unable to update the receipt file.
-
After you are finished making updates to your expense, click Save.

Responding to an Expense Request
There are different actions you can take on an expense request submitted by your co-parent. To respond, go to the Expenses.
-
Find the expense you want to respond to on the Expense Log.
-
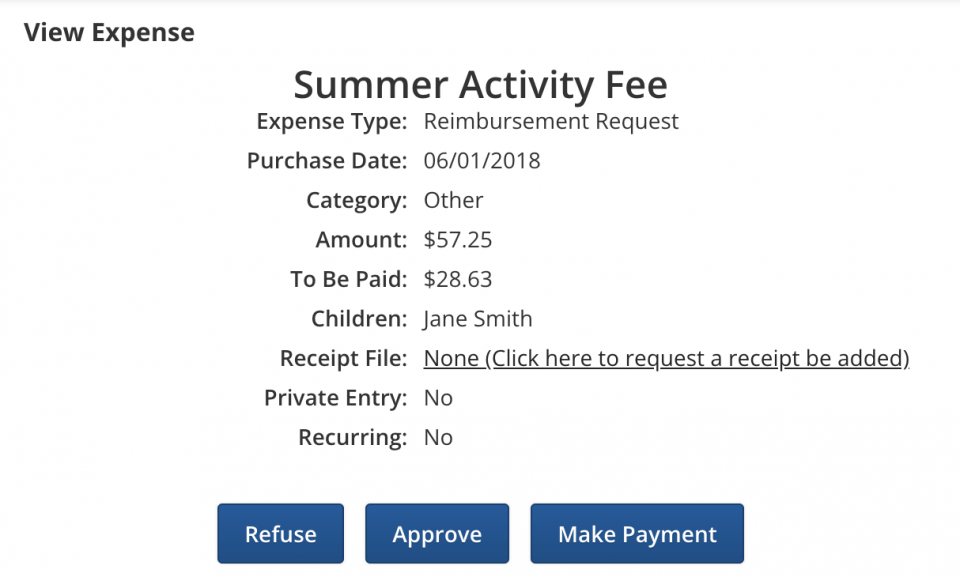
Approve: Approving an expense informs your co-parent that you agree to the request.
-
Refuse: Refusing an expense informs your co-parent that you do not agree with the details.
-
-
To mark the expense as refused or approved, click anywhere on the expense to open it. Then click Approve or Refuse.
-
If you wish to request a receipt be added to this expense, click the link for None (Click here to request a receipt be added).
Note: If you mark an expense as refused, you are still able to mark the expense as approved at a later time. However, once an expense is marked as approved, it cannot be updated to refused.
Expense Status Definitions
The status of an expense request will update depending on the actions taken by the co-parents. Here are different statuses you may see throughout the Expense Log.
- Open: Expenses that have not been responded to or had any payment activity will have a status of open.
- Approved: The co-parent to whom the request was made has agreed with the expense.
- Refused: The co-parent to whom the request was made has refused the expense.
- Approved (Payment Unconfirmed): The co-parent responsible for payment has logged a 'Check/Other' payment in the system. This payment, that was made outside of OurFamilyWizard, is waiting for confirmation of receipt by the other co-parent.
- Approved (OFWpay in process): A payment through OFWpay™ has been scheduled but not yet completed.
- Paid: The expense has been marked as reimbursed or a Check-Other payment has been confirmed by the receiving co-parent.
- OFWpaid: A payment has been successfully made for the expense through OFWpay™.